Recycled Birthday Balloons Pom-poms
October 4, 2020

It’s been a while since my last post. It was my daughter who encouraged/reminded me about this blog. Hello, welcome back!
I was always conflicted about buying these metallic helium birthday balloons, they are so big and jolly but awful for the environment as they usually end up as landfill and never decompose! So to make myself feel better and give them a longer life than it takes for the helium to leak out. I’ve been making them into pompom room decorations for the past few years. This way the girls get to keep them for longer they take up less space and have them as a birthday reminder or Christmas decoration for years to come.

It’s quite simple really, cut the balloon up into strips about an inch or 2 wide, they don’t have to be uniform, then using your preferred pompom making technique – knock them up! I even recycle the curling ribbon ties as the string to wrap around them to pull them together. I use the double cardboard donut technique from my childhood, wrapping the strips around the 2 cardboard donut pieces until you run out, then snip around the edge in between the 2 pieces of cardboard while keeping the centre secured with your other hand. Run the ribbon between the 2 pieces of cardboard and knot tightly.
World Book Day Costumes Matilda and Miss Honey
February 19, 2017
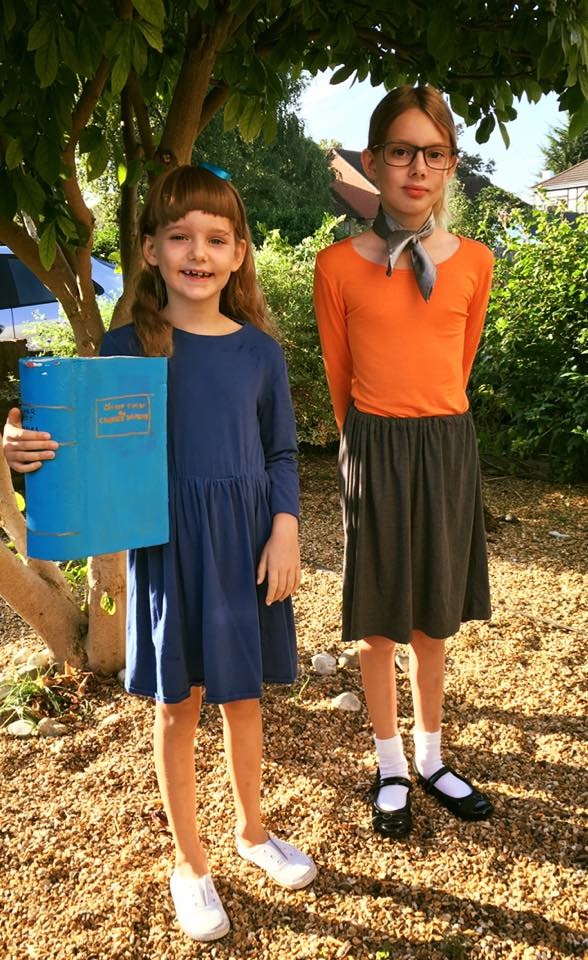
These were last year’s costumes. It was only while discussing them with a friend that I remembered I hadn’t posted about them. They are of course Matilda and Miss Honey from Roald Dahl’s brilliant book.
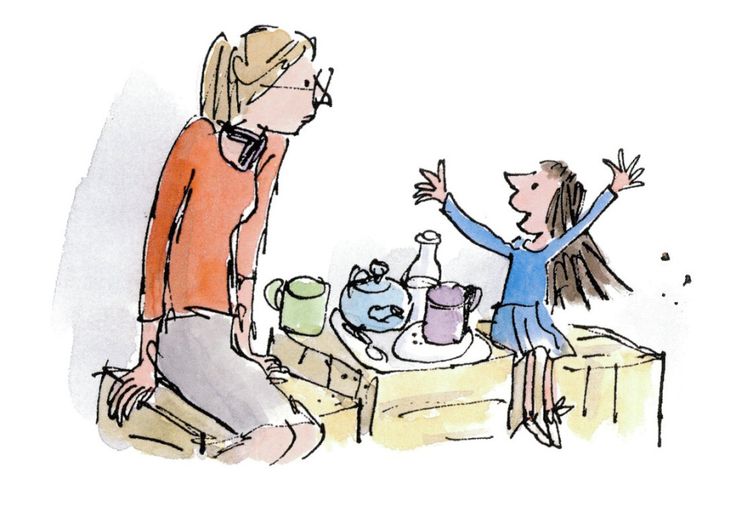
These were easy peasy to make and based on the Quentin Blake illustrations below.
The Matilda costume was created from 2 primark blue t shirts one long sleeved one (cheaper) sleeveless vest that were both in the same material. They were both adult ladies ones, the long sleeved was a size 6 and the other the largest I could find, size 20 I think. First I took the long sleeve tee in to fit my daughter a bit better I did this by increasing the seams on the shoulders and down the sides the sleeves were narrow enough. This brought the neckline up a bit and made it into more of a boat neck – the excess fabric simply tucks inside. The skirt was made from the other bigger t shirt. I cut the top part off just under the armpits to create large tube and attached this to the adapted long sleeve tee, with a half shearing elastic stitch that I’ve used for t shirt dresses before. (Hand wind your bobbin with a colour matched elastic, with normal cotton thread in the needle sew as usual to self gather and maintain t shirt stretch). The other bits of this outfit are white plimsoles from primark and a faux/clip in fringe bought from eBay. The book prop is a cereal box with a piece of pipe lagging stretched over one side and hot glued in place covered in paper and painted.
Miss Honey’s was even easier! Bought a long sleeve orange t shirt from eBay and made the skirt from a large men’s grey t shirt from the charity shop. I cut the t-shirt from arm pit to arm pit, keeping the bottom hem and side seams, I turned over the top of this large tube of fabric and hemmed it, and ran a length of elastic through this. Miss honey scarf is a silver grey napkin from the charity shop, and her glasses are pound land reading glasses with the lenses popped out.
Hope your World Book day outfits are as simple as this to make?
Peacock Butterfly Costume
November 3, 2015


We made this costume recently for the ‘Ugly Bug Ball’ at school.
After deciding she wanted to be a Peacock Butterfly (of course!) my original low effort costume idea was to buy a butterfly kite and attach the wings to a long sleeve t shirt. But my thriftiness got the better of me so decided to paint the wing pattern onto white lining fabric instead.

We drew the pattern onto half the fabric (1m length of 150cm wide) with a sharpie/permanent marker. Then painted in each colour with ready mixed poster paint. I traced the outline into the second wing through the thin fabric.
Unfortunately the left wing got a bit crumpled while it was still wet, so if I was making this again I’d leave it to dry flat before moving it.
I cut out each wing and stitched it onto the back of a black long sleeve t shirt. I attached elastic loops to the ends of the wings to go onto her fingers, this meant she could take these off so the wings could fold up behind her for travelling in the car/sitting at school.
She wore the wing t shirt with black leggings and antenna made from pipe cleaners and an Alice band.
Sally from Nightmare Before Christmas Costume
November 3, 2015

It was Halloween last week, I was not prepared. I had agreed to make this costume before and little girls never forget a promise, so I was reminded of it 2 days before All Hallows’ Eve.
Fortunately I had a plan and some old t shirts from the 99p charity shop. The base grey dress is an extra large men’s t shirt with the sleeves removed and two new seams to bring it into shape

I used the sleeves from an orange and a teal t shirt and patched them onto the grey base dress, then took the shoulder areas of the orange and a mint green one for the shoulder patches. A large panel of the real t shirt went onto the skirt with an orange patch. It was all a bit mix and match much like Sally herself.

Then I took a black permanent marker and drew on the stitches around each patch and some patterns on the coloured patches. Some stripes, spots and swirls. I also drew some lines of stitches over an old pair of white tights.
She also had a pair of stripey socks to go over the tights but she wore her wellies for this picture, which is a shame.
Elsa from Frozen Costume
August 26, 2014
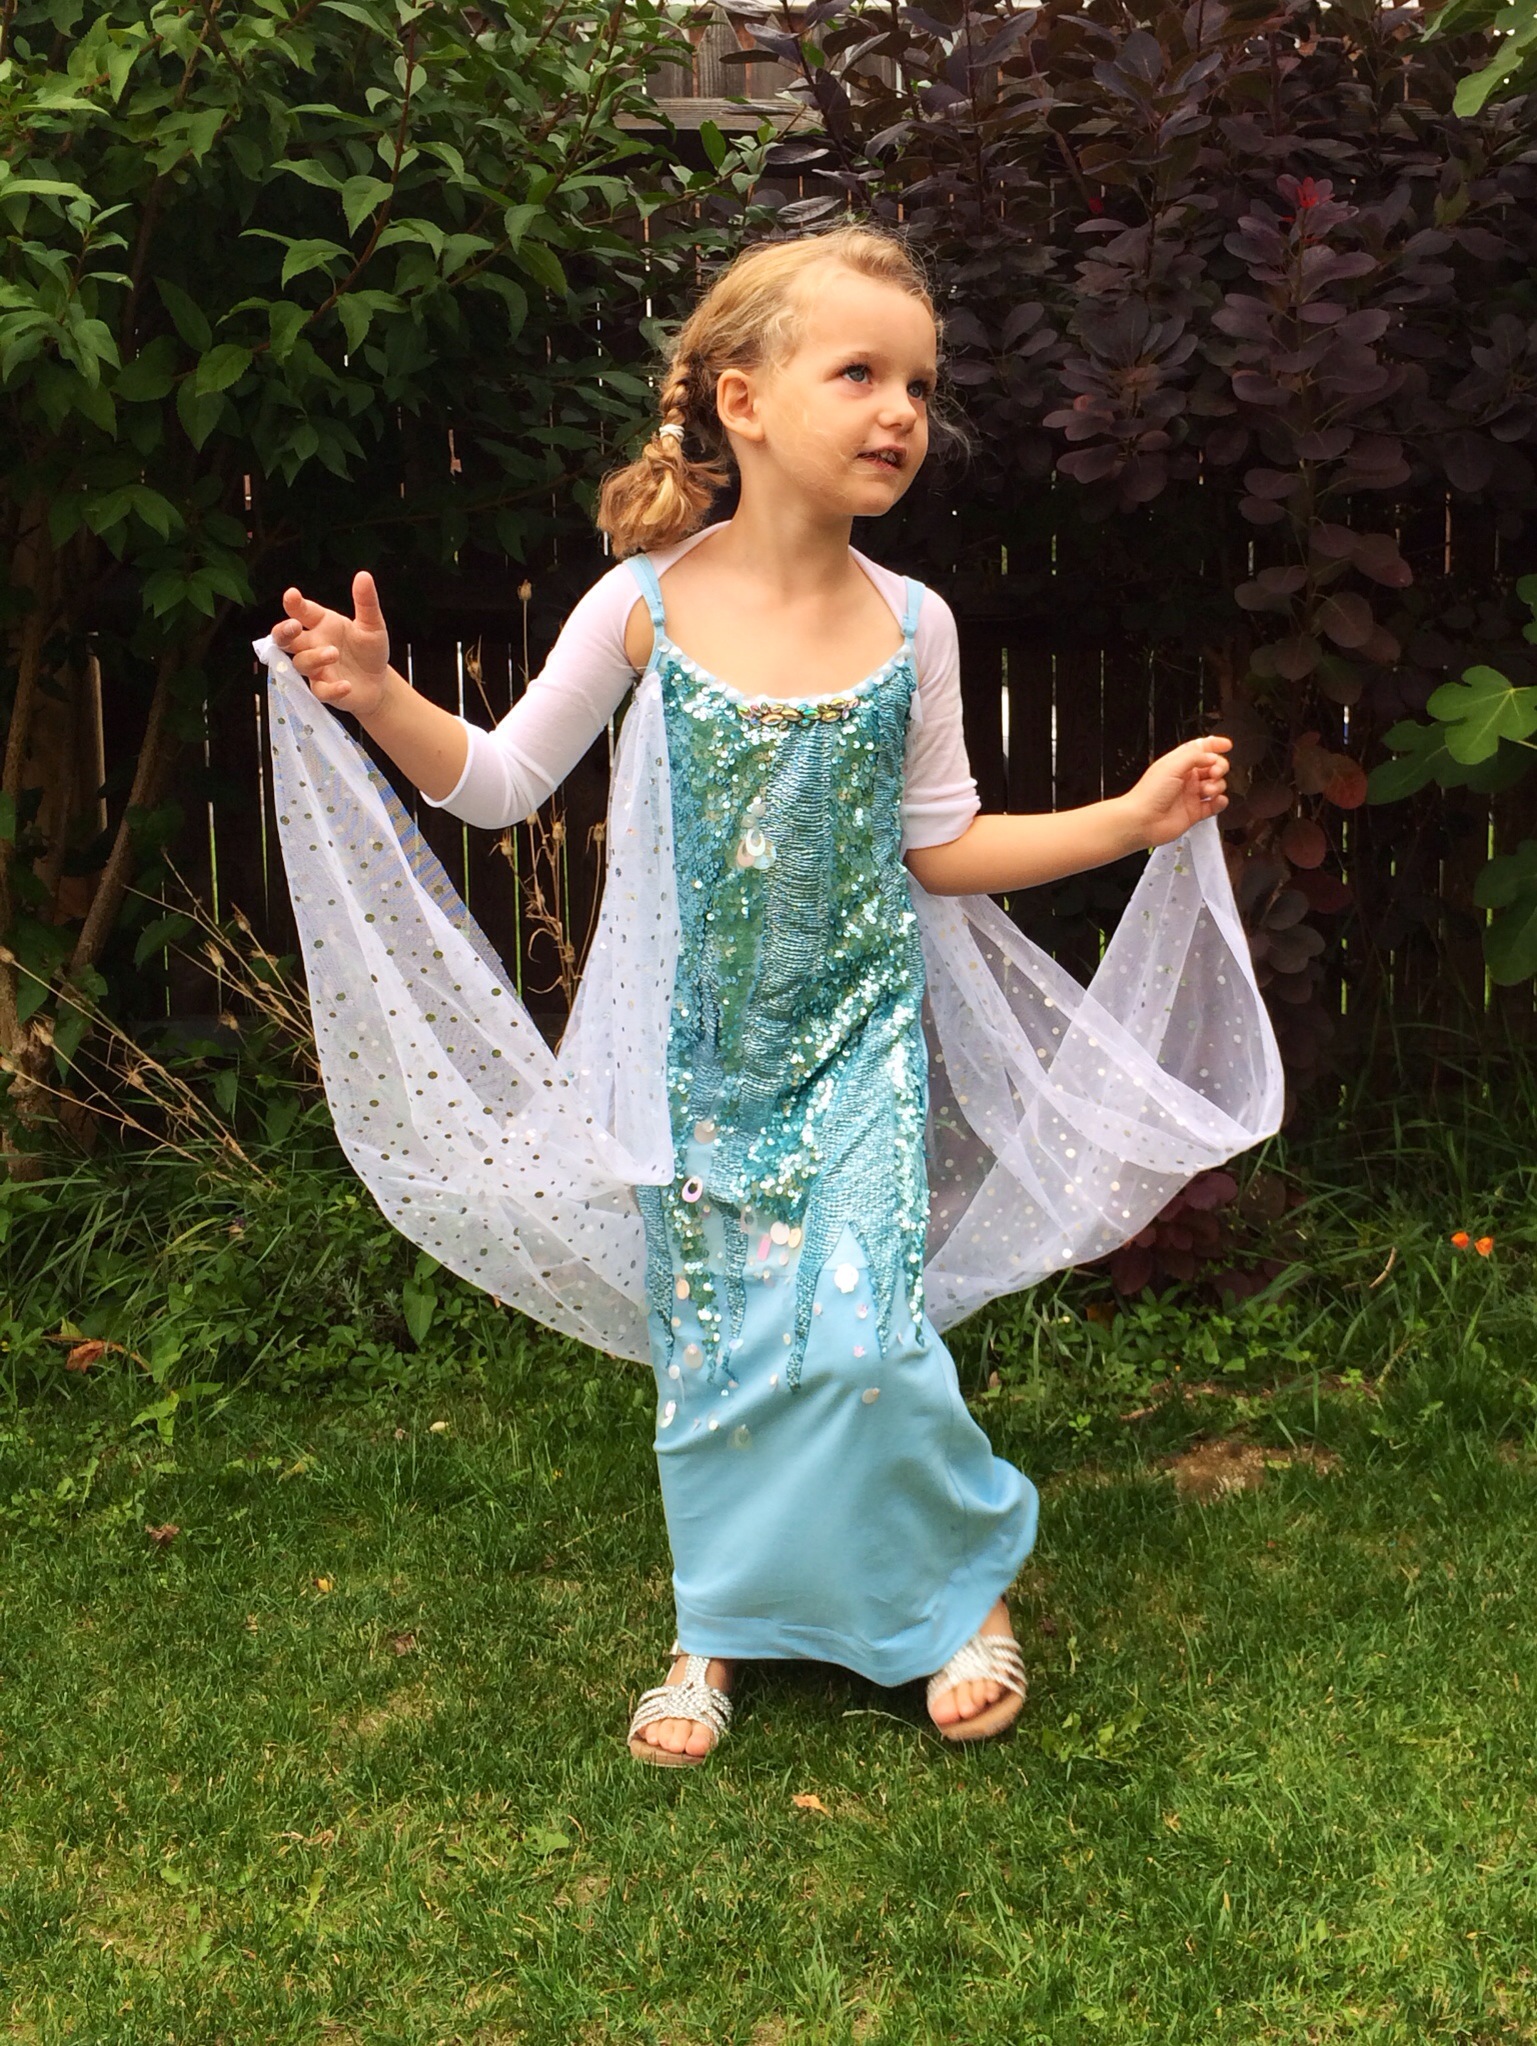


For her birthday Alice was given tickets for ‘sing a long a frozen’, at the Prince Charles Cinema, Leicester Square and as the audience is encouraged to wear appropriate dress up, we had a sudden demand for a Frozen dress for her to wear. Her sister had her Anna Coronation Dress I made for her (posted previously).
I bought 2 ladies camisole vests size 8 in sky blue from Primark, to make the base of the dress. I cut across one from armpit to armpit and sewed this to the bottom of the other vest to make it dress length. These vests had adjustable bra type straps so I was able to reduce the length to fit Alice (and leave growing room). I bought a sparkly, sequinned net curtain from a bargain homeshop (can’t remember the name of it) for £6.99, this became the cape part of the dress. I used the whole width of the curtain and gathered it to fit the vest dress from front strap to front strap around the back and then sewed it on. I had the bits of light blue sparkly fabrics left over from a mermaid costume (I still haven’t posted about!). The sequinned one was part of a dress bought from eBay and the metallic fabric came from a top bought in a charity shop. I didn’t have enough of either to use just that so ‘patchworked’ the two fabrics onto the vest dress as appliqué. I tried sewing this on with my sewing machine, but it really didn’t like the sequins so after replacing the needle twice I resorted to hand sewing the pieces on and adding a few iridescent sequins that came in a mixed bag from Poundland.
I was undecided about the need for the sleeves, as we were going to the sing along in August, but at the last minute took a pair of white sparkly tights from H&M size 13-14, and cut one leg off and removed the toe part to create a long tube, then cut a long slash half way along so Alice could put her arms into the two sleeves and have a piece of the tights fabric across her shoulders and back, which I think was quite successful.
At the last minute I added two elastic loops to the corners of the cape, to go on her fingers so she was able to hold it up, so it wouldn’t snag on the escalators for the tube.
She looked amazing and was very pleased with her Elsa dress, and we got lots of lovely comments on both the girls dresses, both on our way there and at the event, which was lots of fun and a great 5 year olds birthday treat.
Red Riding Hood
March 12, 2013
 R
R
It was ‘World Book Day’ last week. Martha has been planning her costume since last year, and all the characters she has wanted to ‘be’ have all been a bit tricky. I suggested Red Riding Hood, as really there is only one important piece of costume (the red hooded cape). I used a pattern from ‘Oliver + S Little Things to Sew’ book by Liesl Gibson. (I used her pattern for the tutus I made the girls for their birthday outfits) Its a beautiful and very clever book, this was the first time I have used the patterns provided in the back of the book which you have to trace onto paper to cut the fabric. The red fabric is (of course) a single flat sheet from ASDA, Liesl’s pattern uses a very cute print as a lining but I lined this one in the same red sheet fabric. It came together really easily. Martha picked the button from a small selection of vintage buttons as the local charity shop.
She wore a pretty blue floral pattern dress underneath (eBay) with cream tights and blue ballet flat shoes (Tesco). Her props were a bunch of flowers for Grandma (Poundland) and a basket with pink gingham cloth (left over from the patchwork quilts) with a box of gingerbread men for all her classmates. We bought the gingerbread men from tesco but mixed up some water icing and decorated them with leftover cake decorations.
Alice went to Nursery in her Max from ‘Where the Wild Things Are’ outfit I made her for Halloween but I added the oversize cream buttons to the front of it. In the illustations of the book Max seems to have 5 buttons but the haberdashers only had 3 left of these.

Alice’s Enchanted Garden Party
October 9, 2012


It been 2 months since Alice’s birthday party, so it’s with a fair amount of shame that I am finally getting round to posting about it.
It had an ‘Enchanted Garden Party’ theme, based on the fact that Alice wanted to be a bee, and her sister wanted to be a butterfly and I guessed that most of her little friends would have a fairy dress/animal costume or flowery party dress to hand.
At the last moment it nearly didn’t happen, Alice’s big sister brought chicken pox home with her at the end of the school year and Alice got it 10 days before her birthday and really struggled with it, we sent a warning a few days before that although probably un-infectious we didn’t want to be responsible for a chicken pox outbreak, but fortunately most of her friends had had it before, but she was still pretty poorly on the day of the party, poor thing.
I made the invite with images from graphics fairy. Alice’s bee costume consisted of a birthday tutu, which I made with a pattern/guide from ‘oliver + s little things to sew’ by Liesl Gibson. A stripy ‘queen bee’ t shirt she already had, yellow leggings, some sparkly gold party shoes she already had and a pair of homemade bee’s wings. I made these out of four lengths of about 1m each of galvanized garden wire (from Poundland) a pair of pale turquoise tights (H&M), some similar colour satin ribbon, some iridescent glitter glue (Hobbycraft) and some elastic. I made 4 bee shaped wings out of the wire and stretched the tights over them but cutting each leg into 2 and tying a knot in the open end then pulling them over the wire and stitching them ‘closed’ over the twisted wire ends of the wing shapes. Then getting the 4 wings roughly into position (2 on each side) then wrapped the overlapped twisted wire ends with the satin ribbon. The glitter glue was used to make the pattern on the wings to make it look like the structure of a bee’s wing. The elastic was measured around Alice’s shoulders to her centre back and stitched onto the ribbon.
The garden was decorated with a gazebo (to offer some shade/shelter from the british weather, some colourful blankets, some artificial flowers (Poundland again) cut into individual flowers with the wire stems just stuck into the lawn in bundles and toadstool cushions. I made out of red/beige coloured flat sheets cut into large circles. on the red ones pieces I cut out various sized circles from some iron on t shirt transfer paper (the kind you usually print on first) using coins and lids of jars to make the circles. Then ironed them onto the red toadstool tops. I sewed them together (inside out) on my sewing machine leaving a gap to stuff them with the filling from ‘tesco value’ pillows, then stitched the gap with the raw edges turned in, these we planned to use for ‘musical mushrooms’ but the heavens opened a hour into the festivities and the party was moved inside where we didn’t have the space!
I made her cake with 3 layers of sponge filled with buttercream and strawberry jam, using red and white moulding icing to cover the top to make it another toadstool and then I made 3 small bees to decorate it, with some green spikey ‘grass’ cut out of green moulding icing to cover the bottom. I bought some ready made writing icing to pipe her name which was a bit too transparent, I will make water icing next time, but when it was all covered in cake glitter I think it looked ok, and most importantly it tasted pretty good. I made some pink cupcakes for the birthday tea too, also covered in cake glitter!
It was a shame she was a bit off colour for the party and that the rain put a stop to the fun in the garden, but I think all her friends had a good time nevertheless, and I did get around to posting about it before her 4th birthday!
Postcard Greetings Cards
June 26, 2012
I have been making these for years and only thought about posting about them yesterday as I made two birthday cards.
I use postcards that usually come from postcards collections or little postcard books. As it works out very reasonable per card. I like the book covers collections from penguin, puffin and ladybird. Which I got from amazon. The penguin one features classic titles in their signature plain orange top and bottom style. So I tend to pick my friends and family’s favourite books, but the ladybird has a few good ‘how to’ and ‘how it works’ covers, with the lovely retro illustrations from my childhood.
The card blanks with envelopes usually come from ‘the works’ discount bookshops, (who, I notice, now have an online shop) they are 5″x7″ which accommodates most standard postcard sizes. I attach the postcards with photo corners, (I like these brown paper ones from paperchase), so they are not permanently stuck. Which means the recipient can remove them if they wish to send to someone else!
I am not sure whose bright idea was black envelopes, if you don’t have a metallic pen handy how will Mr Postman read the address?

Half Hour Bunting
July 27, 2010


I had promised a friend that I would make some bunting for her son’s 3rd birthday party, obviously I left it till the last minute but managed to knock this up in about half and hour on my sewing machine. I made it double sided so it looks good if its hung away from a wall/fence/other surface and there is no fiddly hemming to do. I made my pattern from a piece of A4 folded in half lengthways and cut to a shorter length isosceles triangle. (I think about 25cm long), it just looked like the right proportions for the flags. I used fabrics from my hoard of recycled bits a bobs – mostly bed linens and curtains plus an old shirt I bought in the charity shop for £3. The pink gingham was bought to use as a tablecloth for my daughters’ christening. I did buy the fabric tape on ebay, I have used bias binding for this before as it comes in such jolly colours however this cream stuff was cheaper and it turns out easier to work with. I cut out the flags as per my pattern, 3 out of each fabric, then sewed the two long sides with the wrong sides together then turned them inside out using my sewing scissors to push the ‘noses’ to a point and ironed them flat, then folded the tape in half and sewed it together for 30cms for the leader on the bunting to tie it up with, then sandwiched the un-sewed side of on the the flags into the fold of the tape and sewed straight through it. Continuing to add flags every 7cms -ish, I used the width of the sewing surface on my machine as a measure, until I ran out of flags then sewed another 30coms of folded tape for the end. Job done and it looks pretty good, if a little feminine for a boys birthday party, unfortunately my hoard does not include much dinosaur fabric, maybe I’ll start looking out for some in the charity shops.
Cute as a button
June 14, 2010
I had the idea for a cute as a (button) t-shirt for a while and then was lucky enough to find a monster bag of embroidery silks and needles in a local charity shop for £2! The t-shirt came from tesco in a pack of 4 different colours and I fished the button out of the spares box. I printed the text in a simple script font and traced it through the t-shirt with a pencil. Then ’embroidered’ a running stitch over the text. The photo above is of my working out which of my cache of lovely coloured silks I wanted to use. I used the full thickness of silks not splitting them up (as I was always told to do) so had to use a needle with a fat hole and very pointy end.
I was very pleased with the result, a very simple t-shirt and a little bit different to the ones you see in the shops, and Alice likes to fiddle with the button and try and chew on it (she STILL doesn’t have any teeth!) – I hope I have stitched it on properly I don’t want her to swallow it, although I guess we would have the same problem with any of her tops with buttons on them!


