Princess Anna from Frozen Coronation Dress
April 27, 2014


It’s been a while, but am returning to posting with this costume made for my now 7 year old (how has that happened?). Her best friend is having a Frozen themed party next week and it seems this current Disney Frozen kiddy craze means there are no costumes to buy anywhere! And as the best friends have been Anna and Elsa every playtime since Christmas I felt I should get the sewing machine out!
I am in the middle of a house overhaul and in a recent cull of my collection of vintage fabrics found this 60s Regency Stripe fabric in dark olive green and cream, perfect for Anna’s skirt as worn to her sister Elsa’s coronation in the film. Before I found this I did have a plan to use a solid green dress lining I have and sew a contrast colour satin ribbon in stripes which I still think would work pretty well.
To make the skirt I sewed box pleats in 6″ lengths at the waist of the skirt, hiding the cream stripes inside, my fabric was only about 36″ wide so I used double width and sewed two seams to join the front to the back. I sewed a generous hem in the top and elasticated the waist gathering the pleated fabric to the size of Martha’s waist. Then cut and hemmed the bottom.
The corset top of Anna’s dress is a black spaghetti strap ladies vest from H&M in XS (£3.99). I had to shorten the straps by about 6″ unpicking them from the back cutting them shorter and reattaching. I then cut the hem of the vest into a point at the front and straight at the back a little lower than Martha’s waist so it would hide the waistband of the skirt. Then I edged the top and bottom with gold ribbon, I didn’t bother to hem the vest.
For the little capped sleeves I cut two squashed semi circles out of doubled over emerald green satin fabric. (The fold is the straight edge) and sewed them together right sides in leaving a gap in the middle of the curved edge to pull them right sides out. Then I attached the gold braid with bobbles on around the curved edge with a zigzag stitch also sealing up the gap. These were attached by hand sewing the end points to the vest top where the straps are joined to the body of the vest.
I know Anna’s sleeves in the film are edged with green lace, but I didn’t have any, however I found the gold bobble trim in another box of collected vintage sewing stuff and they reminded me of the bobble trim on Anna’s travelling cloak! (Yes I have done my homework!) I also had a plan to embellish the front of the corset with blue and pink fabric paint, but Martha is happy with it as it is and I am slightly afraid of spoiling what I think is a pretty decent job!
If necessity means that any readers out there are driven to trying out this make for their own Frozen costume, I would recommend looking for a similar curtain/upholstery fabric on eBay or Etsy, useful search terms would be regency/brocade/jacquard stripe. Or try the ribbon stripe effect. Please let me know how your projects turn out?
‘Sukie Iron Ons’ T-Shirts
March 19, 2012


My husband bought me the ‘Iron Ons’ book by graphic designers ‘Sukie’ for christmas – I believe it was from my amazon wish list, but I have seen these for sale (new) in oxfam shops. I have been a big fan of ‘Sukie’ wrapping paper for a while and even have a sheet of their mixed font alphabet paper framed in our stairwell. So the opportunity to make some stuff with the quirky cute designs has been very tempting – but not so much that its taken me till March to make use of them!
I had planned to upcycle some old t-shirts with the iron ons, but all the girls’ tees seem to be covered in too many stains for sucessful up-cycling, so I had to buy new. I found these 3 packs of plain colour capped sleeve summer tees in tesco, so bought a pack in size 5-6 and another in 2-3, one set for each for Martha and Alice. I let them pick their own images from the book, with a bit of persuasion from me of course. Martha chose the page of pink and khaki butterflies and the ‘princess castle’ with home sweet home on it. Alice liked the animals in the tree which reminded her of her favorite book of the moment – ‘Stuck’ by Oliver Jefferies (firmly recommended by the way). I chose the two half page alphabet designs the same as I have hanging in the stairwell, the colours in these included the same pink and peppermint green as two of the t-shirts in the packs so I put those onto the dark blue ones, the pink butterflies and 3 cute birds on branches went onto the pale green tees and the tree and palace went onto the pink tees. With the planning done I got out the iron, I do most of my iron ons on the kitchen counter as its firm and flat enough to apply some pressure, I am however pretty tall so can stand on my tippy toes and apply a considerable amount of my body weight to the iron during the process, a sturdy kitchen table would work for shorter folks, but be careful not to scald the surface. You have to have the iron on its hottest setting and no steam or water.
They went on pretty easily, and I am really pleased with the results, 3 super cute t-shirts each for the up-coming summer, that look much more expensive than they actually were. The girls love having an influence in what they wear and this is a such a quick and easy way for us to customise things. And we have loads of these lovely ‘Sukie’ designs left in the book, now lets see, what can we use them on next?…


I have no idea when ‘World Book Day’ is as every school seems to be doing something different every day all through March! But Martha’s School had a dressing up day on Friday. I was reluctant to let her dress up as a disney princess for this one, as they are from films, not books. We settled on the classic ‘The Tiger Who Came to Tea’ by Judith Kerr, whose beautiful illustrations bring the (slightly surreal) story to life. For Sophie’s costume we needed a blue long sleeve tshirt, a Purple A-line pinafore dress, a big Blue Bow for her hair, paintent black shoes and those pink, blue and white harlequin tights. We had the long sleeve blue tshirt, and paintent black school shoes and I made the purple dress out of a pair of purple ladies vests (size 12) from tesco (£2 each in the clothes sale!), – I detached and sewed the two back panels together, as the front panels had a very low neckline for a 5 year old. She had a pair of white tights and a trip to the local haberdashery supplied the big blue ribbon for her hair and a blue and pink pots of dylon fabric paint. I made two forms for the tights by cutting two pieces of card into long ‘leg’ shapes, about 10cms by 60cms with rounded ends at the ‘feet’, I divided the forms up into squares and drew these on with marker pen. Then stretched the tights over them and spent some time painting in each of the squares with the blue and pink fabric paint. I was trying to be a bit thrifty with the paint and so painted them with as little colour as possible, the bonus of this was that they looked more like the rough colouring in Judith’s original illustrations.
Then as luck would have it the local oxfam had a soft tiger toy in their sale bin for 50p! He even growl’s when you squeeze his tummy. He is obviously much smaller than the huge, greedy tiger from the story but a good prop nevertheless!
Circus Party
January 9, 2012


Martha turned 5 inbetween christmas and new year, but we held her birthday party before christmas to maximise the chances of some of her friends being available to come to it. It was a circus theme and I organised all of it, and thoroughly enjoyed it, I think it was pretty sucessful, even though I did get a bit carried away with the theme.
I booked our local village hall and I made the invites above on photoshop with a little help with some lovely retro circus images from the graphics fairy and some free fonts from here; http://www.i-do-it-yourself.com/2009/01/fonts-circuscarnivalwild-west-type. I also attached a child’s ticket to each invite, as well as some info for parents.
I think all parties should be fancy dress, so asked my girls what they wanted to be for the circus party, Martha wanted to be a circus ballerina, and Alice decided she wanted to be a monkey – can’t argue with that. I made Martha’s costume with a leotard from ebay a tutu pattern from (my new favorite book) ‘Oliver + s – little things to sew’ by Liesl Gibson, and some sequin butterfly sew on embellishents (I picked these up in a recent trip to New York). Alice’s monkey costume I bought from ebay, it was alot cheaper than making one, and up until the last minute was doubtful she would actually wear it! I made myself a ringmaster’s tailcoat from a red velour blouse I found in the charity shop, cut the front short and added the off cut to the back for the tails and added covered shoulder pads as epaullettes with lots of fringing and the spare gold fabric I bought I covered the open front to make faux lapels. I was incredibly camp, just what you would expect at a kids circus! I did have a top hat too but mostly forgot to wear it!
The entertainments were circus sideshows, Hook a duck was assembled with some cheapo rubber ducks from ebay with modelling wire loops inserted in their heads and 3 bamboo sticks covered with red tape with cup hooks glued into one end. I marked a duck pond out onto the floor with coloured masking tape. Elephant Hoopla, was a large piece of cardboard with an elephant’s face painted on with a trunk made out of packaging tube, jointed at the end so there was a hook to it and hoops cut out of card too and painted. Coconut shy was 3 more cardboard packaing tubes painted with 3 coconuts balanced on the top (the easiest coconut shy in the world but at least the 4-5 year olds had a chance of winning), my mum and auntie manufactured some excellent stripey beanbags filled with dried pearl barley for the kids to knock the coconut off with. And pin the nose on the clown, another face painted onto cardboard with a few numbered red circles for noses with blutak on the back and my mum’s scarf as a blindfold. (On the day I had forgotten to pick up the handy sleep mask from the flight to NYC to use for this purpose!). My very talented middle sister provided face painting, and my little sister and her boyfriend were photographers. With a ‘pass the parcel’ game included in the fun and packets of haribo offered as prizes for the games we had enough to keep all 30 kids happy until the birthday tea.
We did hotdogs and popcorn and apple wedges (as a suggestion for toffee apples – without all the sugar), for the circus themed food, which went down really well with the kids. I pre-bagged the popcorn into individual bags before the party – also bought from ebay. These were in each table setting along with a drink and a helium balloon, I bought a kit with the gas tank and 50 balloons again from ebay, most of these sadly ended up in the rafters of the hall to high to retrieve!
The cake was a ‘big top’ made with 3 layers of cake mix cake 2 x chocolate and one vanilla made in a square tin, and stacked with chocolate buttercream in between each layer. I trimmed the sides of the squares to neaten up the shape and then used these offcuts to construct a pyramid shape for the top, sticking the bits together with buttercream and carving it to make the shape. I covered it in white fondant icing, there was two layers on the top to smooth out my slightly lumpy pyramid. I used coloured icing to make the stripes down the sides of the tent the bunting along the top edge and green for some grass at the bottom (to hide the messy bottom edge). I made some paper flags one with a happy birthday message written on it, by gluing triangle shapes to bamboo skewers, these went into each corner and the middle and provided stability for the cake too. I put a couple of circus animal toys through the dishwasher to sterilise them and when dry I dressed them up in icing circus outfits for the elephant got a fancy panel over its back and both him and the lion got party hats. I think these were the touch that made the cake look really circusy.
The children all went home with a party bag (a plain brown paper carrier bag with a name sticker made from an address label printed with the graphics from the invite), which included glow stick bracelets (poundland), a chinese purse for the girls (ebay) a couple of small circus animals (from a 2 collections of african animals from amazon), a small pot of candy floss (ebay) and of course a piece of cake.
It was loads of fun, lots of Martha’s friends came in excellent outfits too, special mention for the tattooed lady and strongman, the lovely trapeze artist, some excellent and inventive clowns and all the princesses, batman, superman and mr bump!
Ribbon Alice Bands
September 26, 2011


Martha loves an ‘alice band’, and we seemed to miss all the blue school ones in the ‘back to school’ season in the shops, so I thought I would have a go at making some. We made these in her new school colours but could easily repeat this to make matching Alice Bands to go with her favorite outfits too!
I got 5 plastic alice bands for £1 in Poundland, they had a kind of holographic design on them – lovely, but importantly didn’t have the row of little spikes around the inside, I don’t think you could ‘wrap’ those ones as easily and Martha refuses to wear them as she says the spikes hurt. I used PVA Glue, (huge fan of PVA glue and one day plan to publish a ‘1001 things to do with PVA’!) painted small sections of the alice band securing the end with a clothes peg and wrapped the alice band in ribbon. I bought a few different ribbons from my local haberdashery a gingham one, a grossgrain (most expensive) and a couple of double faced satins, and used about a metre of each for each alice band, including the little bow. Continuing to paint small sections, about an inch at a time (as this avoids all the ribbon getting sticky and fiddly), and wrapping making sure that the edges matched up or overlapped a little, until I reached the other end. Then trimmed off any excess ribbon and held it with another peg and left it overnight to dry. I used plastic clothes pegs as in my mind they are less likely to stick to the gluey ribbon than wooden ones would, they came off quite easily anyway.
I ‘finished’ them by tying a small bow in any left over ribbon (there wasn’t any excess grossgrain I used the whole metre for the wrapping I guess because it was slightly narrower than the other ribbons) and sewed it onto the alice band, trying to catch some of the glued on ribbon with the stitches to secure it, but essentially just taking a stitch into the back of the bow through the knot then back through and around the alice band. Then I wrapped the ends with a bit more cotton thread to bind the ends of the ribbon to the alice band and put another blob of PVA over the thread behind the bow and over the two bound ends.
Martha has been wearing them to school and so far they seem to have stood up to it unlike her new shoes that came back on the first day more scuff than leather! (Although one has disappeared completely at school already – alice band not shoe!)
School Bag
September 5, 2011


Even though its my big girl that starts school next week, I made this one for the littlest Peacock this week. I bought this set of vintage alphabet flashcards recently just because I couldn’t resist ‘A is for apple that Alice is eating’ – I am such a sucker! And as Alice has been using a freebie sports bag for nursery for sometime, I thought I would use it to make her something more suitable.
I used a small girls backpack from Primark that had a hideous cutesy poodle on it (to be fair, I have seen worse) and thought I would copy the flashcard (but photographing it -although I do have a scanner somewhere!) and editing it in photoshop to clean it up a bit. Then printed it onto the t-shirt transfer paper I used for ‘shopping bags’. ( ) I couldn’t iron it straight onto the poodle bag as I presumed it would melt. So I ironed it onto some lime green cotton fabric I had knocking about. I ironed the edges over and then sewed the patch onto the front of the bag.
I think it looks pretty cool and is much less shameful to hang on her peg at nursery anyways.
Recycled Princess Castle and Rainbow
August 19, 2011

I love making toys from stuff destined for the bin. We made this princess castle with bits and bobs of recycling last week, it made use of an old teabags box, a kitchen roll tube, a toilet roll tube, a tube from the inside of some wrapping paper (cut into 2) a pringles tube, a paper cup and the pointing bits from the inside of an egg box. Martha and I asssembled these pieces and cut some castle top shape strips out of an old cereal box to decorate the tops of a tower and the tea box. We glued these together and to help them stay together while the pva glue dried I used some masking tape. We painted the whole lot pink (of course!) and left it to dry.
The next day, I cut out some windows and arrow slits from black paper and Martha chose where to stick them on (the big window in the paper cup roof of the pringles box is the princess’s bedroom!). Then we used the frilly bit from the edge of a doily to decorate the egg box bit roofs. Martha drew some flowers and we stuck them on the sides of the towers and then decorated the whole lot with some sequins.
Martha also wanted to make a rainbow to go with her castle, so I cut a semi circle out of a bit of left over mount board, but any thick cardboard would work and made two supports for each side by cutting half a slit in the rainbow and half in the support and sliding them together. Martha drew a rainbow on the white side with crayons, and then we painted each coloured stripe with glue and covered it in different coloured glitter. To make the rainbow as sparkly as possible.
Once they were dry she has been playing with them ever since, using happyland figures. I think they look pretty good for rubbish.
T-shirt summer dresses
July 8, 2011


I made 4 of these yesterday, I think they took about a half an hour each, however I have had the t-shirts/bodysuits and fabric knocking around now since our last/only spell of hot weather in april. Same concept as the maxi dress I made for myself last year (https://mrspeacocksthingstomakeanddo.wordpress.com/2010/08/26/maxi-dress/) They are ‘sew’ easy (see what i did there?).
For Martha’s (4 year old’s) dresses, I took a pack of cheapy t-shirts – I think these were from sainsbury’s (3 for £7) and bought in some fabric for the skirts of the dresses. For the plain white t-shirt I bought a half a metre of fancy floral patterned cotton (£2.25), and for the patterned t-shirt half a metre of plain old coloured cotton muslin (£1.12) . I made the skirt of each one first by sewing a shear stitch around the top of the skirt to gather it, on the floral patterned fabric which was a bit wider I sewed it twice to gather it up a bit more. To sew a shear stitch replace the bobbin thread with shearing elastic (Gutterman do this in matching colours to your fabric) – I hand wind my elastic bobbins and my machine stretches the elastic onto the bobbin as it winds and the stitch doesn’t work. Then when it was about the same length as the double the width of the t-shirt I swapped the bobbin for the usual thread and sewed the seam and the hem. After measuring her, I made Martha’s ‘skirts’ 40cm long. I marked a line with a pencil 20cm below the neckline all the way around the t-shirt then with the skirt the wrong way out and upside down (see picture) pinned it so the shear stitch followed the pencil line all around the t-shirt. If this sounds confusing my mantra while dressmaking is “good sides together sew on the wrong side”. Swapped the bobbin for the elastic one again and sewed it all the way around, then pulled the skirt down over the bottom of the t-shirt and pressed it down a bit.
I made Alice’s ones with bodysuit/baby vests (sainsbury’s again, 5 for £6.50 I think), -the ones with poppers at the crotch -which provides internal pants to cover her nappy, but in exactly the same way as above.
They are super cute and probably work out at about 3 quid each, maybe a fiver for the one with the fancy fabric, so pretty economical too! I would like to take this opportunity to thank my mum for letting me have the 2 hours required for this project by minding the nippers for me yesterday morning, otherwise I would have had the t-shirts and fabrics sitting about until next summer!
Royal Wedding Union Jacks and Bunting
April 28, 2011


Ok so nothing like leaving it to the last minute, but here are the Union Jacks and red white and blue bunting we made today for the Royal Wedding tomorrow. I could not bring myself to buy crappy plastic ones and wanted the girls to be involved in the making.
I took two pieces of cream coloured, unbleached muslin I had knocking about that looked about flag sized and found two bamboo sticks in the garden that haven’t been used for my peas. Then we ‘painted’ the union jacks on with poster paint. I folded the flags into quarters then folded them into triangles as in the picture. I made a rough ‘stencil’ with a piece of A4 so that Martha could paint the blue triangles of the flag in the right places with neat(ish) edges. We used plenty of paint so it would soak through the folded fabric and paint all the triangles at the same time. In hindsight it would have been easier if the paint had been thinned a little with water, I touched up the triangles that came out a bit too patchy. Then we opened them up and painted the red cross through the middle and the other red bits. We hung them on the washing line to dry, then painted an inch of glue down one of the short edges and rolled the bamboo cane up in the gluey fabric and left it to dry.
I am really pleased with how they came out I was hoping for a vintage look to the flags and we got that with the kiddy painting and the unbleached muslin with slightly frayed edges. The only real problem we had with their manufacture was my insistence that as it was a sunny day the project should be undertaken in the garden, but it was a really windy day and we struggled to keep the fabric, paint pots, safety newspaper and indeed the children in place for very long.
I also knocked up some bunting with some left over fabric tape from my last bunting project (https://mrspeacocksthingstomakeanddo.wordpress.com/2010/07/27/half-hour-bunting), some more of the unbleached muslin and some red and blue cotton lining fabric I had bought to make the girls some dresses with (I am hoping there is still enough left!) Unlike the last bunting, I left the raw cut edges on these triangles to give it the vintage look I was going for, then just sewed the tape in half lengthways with the short edge of each triangle sandwiched in between.
So now we are all ready, the girls even had a practice waving the flags, shame we are staying at home to watch it on the telly!
Pink Cat Costume
November 1, 2010
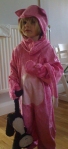

Martha wanted to be a Pink Cat for Halloween this year. Where are you supposed to get a pink cat costume from? It was time to get out the sewing machine.
I bought the pattern online, I probably could have made one up, but would have wasted an acre of fabric, sometimes the economical solution is to spend some money and follow the instructions. I usually get my patterns 2nd hand from ebay, but this was much too tricky so I found someone selling this butterick pattern new on ebay, google searched the number and found someone selling it for half the ebay price! I shopped around but still couldn’t find any bargain pink fun fur, or fleece, so settled for super naff, crushed velour, new and by the metre from ebay for £2.99 per metre, plus postage.
Its a fairly complicated pattern consisting of a universal jumpsuit, a hood, mittens and spats (to go over your shoes – I could not be bothered with these!). I did tweak the pattern slightly, making the opening at the back and making it overlap so I could use velcro instead of a zip and add a lighter pink patch for a ‘tummy’. I also added a light pink tip to the tail, light pink inside the ears and (my favorite) light pink pads and paws on the mittens. I cut rough patterns for these, (so they 2 sides matched) cut them out, then applied them with bondaweb. It took me a while with the iron but I think it was worth it, without these details, from a distance she could have been wearing a velour hoodie tracksuit with a tail! (As I type that I think, I could have just bought her one of those and ironed on the detail bits, saving me and my mum the best part of a day at the sewing machine!).
Anyways it looks brilliant I am more than pleased and Martha loves it, although she does insist on stopping taking when she is in it and incessantly meowing instead, and REFUSED to have a photo taken in it, hence the rather ropey phone pic above. And then came down with a mystery illness with sore throat and raging temperature for her nursery Halloween party! Hopefully I made it big enough to fit her for next year too.
