Girls’ Bedroom
February 28, 2013
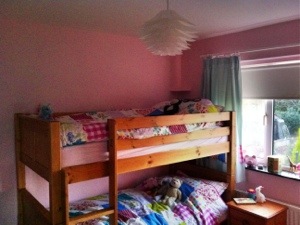
Just after Christmas Mr Peacock and I decided it was time to get the girls their bunk bed. These things always seem so simple!
We found a bed we liked (eventually) as most didn’t seem too solid for climbing up and down (repeatedly most nights) so it took a while to find one that didn’t look like it would collapse/tip over that fitted with the rest of the (antique pine coloured) furniture and didn’t require a remortgage! However it would only fit in the room with a complete refrigeration which meant that the enormous calpol stain on the carpet would not continue to be hidden under the bed. So a new carpet was ordered. So then we thought ok a lick of paint would be best before the new carpet was laid, and of course the girls wanted pink.
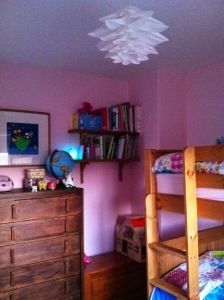
I hate pink. But I compromised (its not my bedroom) but we settled on a pale milkshake pink (Dulux ‘Sorbet’), it still makes me feel a bit queasy but at least you don’t feel it should be Barbie branded.
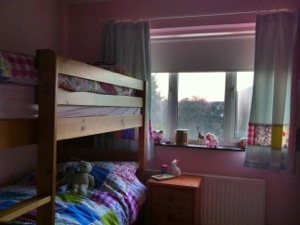
After that I thought I should make new bedroom curtains, but as none of this was in the budget I decided to re-use the old curtains lining and header tape and used a pale blue flat single sheet (£4.50 from ASDA), cut in half, so it was already hemmed, then sewed the sides to the lining, turned over the top and hid the raw edges with the tape. I did add a panel of patchwork towards the bottom to tie them into the patchwork quilts I promised the girls.
The quilts/patchwork fabric all came from my collection of vintage fabrics I have been lining the loft with for years, picked up at boot sales and charity shops they were once, curtains, bed sheets, duvet covers and the odd dress once. I cut nice big squares, 20cm square (plus seam allowance) I like the look of oversized patchwork particularly on kids beds the scale makes the beds and kids seem smaller! So each quilt was 7 squares wide by 10 squares long. I backed them with plain dye flat sheets (again) with a white sheet sandwiched in the middle so the thinner cotton fabrics in the patchwork didn’t show the underneath colour through. All sealed in with a strip of 1″ bias binding turned over the edge.
The other room dressings are a new painting (by me) of the ‘Owl and the Pussy Cat’ with Martha’s favourite toy cat in the pea green boat. A new white ‘lotus’ flower shape lampshade (Argos). And vintage blue ‘Antler’ suitcases for storage on top of the wardrobe.
It is a proper little girls room, they love it, but it still amazes me how a little bed upgrade snowballs into a major project!
School Bag
September 5, 2011
Even though its my big girl that starts school next week, I made this one for the littlest Peacock this week. I bought this set of vintage alphabet flashcards recently just because I couldn’t resist ‘A is for apple that Alice is eating’ – I am such a sucker! And as Alice has been using a freebie sports bag for nursery for sometime, I thought I would use it to make her something more suitable.
I used a small girls backpack from Primark that had a hideous cutesy poodle on it (to be fair, I have seen worse) and thought I would copy the flashcard (but photographing it -although I do have a scanner somewhere!) and editing it in photoshop to clean it up a bit. Then printed it onto the t-shirt transfer paper I used for ‘shopping bags’. ( ) I couldn’t iron it straight onto the poodle bag as I presumed it would melt. So I ironed it onto some lime green cotton fabric I had knocking about. I ironed the edges over and then sewed the patch onto the front of the bag.
I think it looks pretty cool and is much less shameful to hang on her peg at nursery anyways.


